Building a Form with tw.forms
This tutorial will describe how to use tw.forms in a practical application. As an example, we’re going to implement part of a movie database. We will cover:
- Constructing a form
- Displaying the form with values
- Making the form post and validate
- Customising the appearance of the form
- Customising validation
- Interacting with the database
Before starting this tutorial, you must have completed the tutorial on enabling ToscaWidgets in your web framework. This tutorial will build on the application you started there.
Constructing a Form
We’ll start by creating the form that’s used to create or edit the information on a movie. You need to place the following code in the same file that you used for the AddUserForm sample widget, in the previous tutorial. The actual file depends on the web framework you’re using.
import tw.forms as twf

movie_form = twf.TableForm('movie_form', action='save_movie', children=[
    twf.HiddenField('id'),
    twf.TextField('title'),
    twf.TextField('year', size=4),
    twf.CalendarDatePicker('release_date'),
    twf.SingleSelectField('genera', options=['', 'Action', 'Comedy', 'Other']),
    twf.TextArea('description'),
])
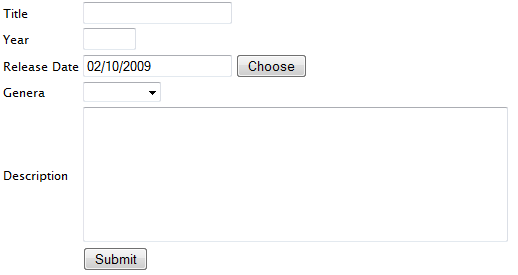
You also need to update the rest of the code, so that all instances of test_form are replaced with movie_form. Once this is done, the form will appear like this:

Note: All the images in this tutorial were generated using TurboGears 2.0b4 and FireFox. The appearance may be slightly different for other setups.
The code above creates a TableForm widget with several children. It uses a few of the more common widgets in tw.forms, to give a feel for what’s available. Every widget has an id, and some widgets have other parameters defined - size and options. If you’d like to experiment with this, the available widgets and parameters are documented in the field reference.
Displaying the Form with Values
To display the form pre-filled with values, modify the template (the actual file depends on the framework) so movie_form is called like this:
${movie_form(dict(title='Example', year='2009'))}
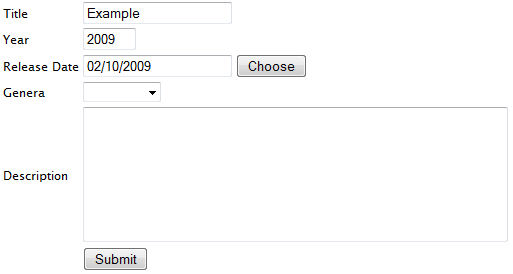
This results in the form appearing like this:

This example is not particularly useful, however pre-filling values becomes extemely useful when we start interacting with the database.
Making the Form Post and Validate
The action parameter to TableForm specifies the URL the form will post its data to (save_movie in this example). We now need to create a controller method that will receive the form data and perform validation. The details of this are different for each web framework.
To test the validation, we’ll make description a required field; change this line:
twf.TextArea('description'),
To:
twf.TextArea('description', validator=twf.validators.NotEmpty),
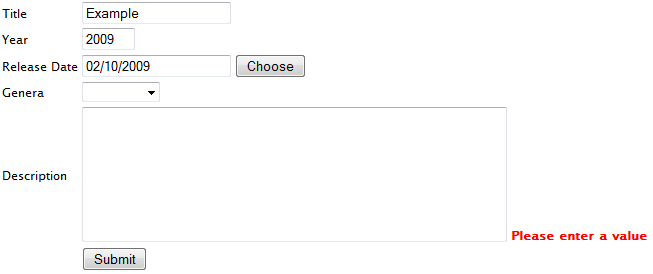
Try posting the form with the description field empty; the following will result:

Now, enter a description and retry. In this simple example, a successful post results in:

Customising the Appearance of the Form
Labels, Help Text and Spacers
A simple way to customise the form is to specify custom label_text. For example, rather than “Year” we want to say “Year of release”, which can can achieve like this:
twf.TextField('year', size=4, label_text='Year of release'),
Sometimes you also want to include a longer explanation of the field; this is possibe using help_text, for example:
twf.CalendarDatePicker('release_date', help_text='In the UK'),
Forms also have Spacer and Label widgets, to help you achieve the desired layout, for example:
movie_form = twf.TableForm('movie_form', action='save_movie', children=[
    twf.HiddenField('id'),
    twf.TextField('title'),
    twf.Spacer(),
    twf.TextField('year', size=4, label_text='Year of release'),
    twf.CalendarDatePicker('release_date', help_text='In the UK'),
    twf.SingleSelectField('genera', options=['', 'Action', 'Comedy', 'Other']),
    twf.Label(text='Please provide a short description of the plot:', suppress_label=True),
    twf.TextArea('description'),
])
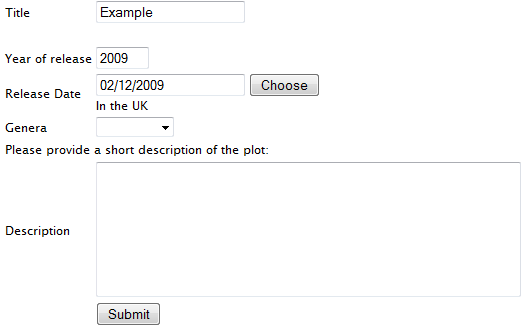
This code results in the following appearance:

Using CSS
To get further control of the appearance of the form, place extra rules in your CSS. Note: this section assumes you have basic familiarity with CSS; if not, start with a CSS tutorial. Some of the more common classes you will want to override are:
- fielderror - applied to the error message. It’s good to highlight this, perhaps displaying in red.
- fieldhelp - applied to the FormField.help_text attribute.
- required - applied to required fields and their label. It’s often useful to show required fields in bold, as a hint to the user.
- has_error - applied to fields that have an error. It may be desired to highlight the field, e.g. with a red background.
Most fields have a particular CSS class defined; the best way to find out about available CSS classes is to use a tool like Firebug to query each DOM element. It’s also possible to apply CSS rules to DOM IDs. Or, if you prefer, you can specify the class on a field, using the css_class parameter.
Other Customisation
Every widget has a number of parameters you can customise. For example, for TextArea you can specify rows and cols, and for TableForm you can specify submit_text. See the field reference for more information on these.
If you require even further customisation of the form layout, you can override the template for TableForm. This is quite advanced usage and will not be explained in detail here. There is also the option of using a different container widget, e.g. ListForm, although in practice TableForm is the most useful.
Customising Validation
In the example above we described how to make description a required field. In a similar way, we can enforce that year must be a number. Change:
twf.TextField('year', size=4),
To:
twf.TextField('year', size=4, validator=twf.validators.Int),
By default, fields are not required - so an empty year would be valid, but if year is specified, it must be a number. To make it required, we would use:
twf.TextField('year', size=4, validator=twf.validators.Int(not_empty=True)),
tw.forms uses the FormEncode validation library, although it has some modifications (most notably UnicodeString), so use twf.validators rather than importing formencode directly. To do more advanced customisation of validation, for example specifying custom error messages, or writing your own validators, see the FormEncode documentation.
Interacting with the Database
There are three main things we need to do with the database:
- Define a table to store movie data
- When the form is requested, load the existing movie data
- When the form is successfully posted, save the data
To do these, we first need to add code to the controller methods, to pass around database IDs and objects. We’ll have the movie method take an id parameter. If this is specified, the relevant movie is loaded from the database; otherwise a blank form is rendered, allowing the user to create a new movie. The save_movie method is updated so it only responds to POST requests; this is important for proper HTTP compliance.
The details of how to do this depend on the web framework. The following pages also contain some notes on how to edit and manage the model in that framework, which are referred to later.
Once this has been done, we can add the code to interact with the database. The details of this depend on the ORM being used.
Note: It is possible to use tw.forms with raw SQL. However, this is not recommended as a lot of code is required, negating one of the key benefits of tw.forms.
When you’ve added all the appropriate code, it’s time to test the system. Note that for this to work correctly with SQLObject, you must have set the validator on the year field, as described in Customising Validation above.
First, browse to /movie, enter some details and click submit. After this. browse to /movie?id=1 where you’ll see the details you’ve entered, and you’ll be able to update them. You can create another movie by browsing to /movie again, and see it by browsing to /movie?id=2.
This gives you the building blocks for using tw.forms in your applications. The rest is down to your imagination!