Pylons
This tutorial assumes basic familiarity with Pylons. Beginners should read Getting Started with Pylons. The tutorial was developed using Pylons 0.9.7rc4.
First, create an app using the standard approach. It doesn’t really matter what options you use, although this tutorial assumes mako templates and that SQLAlchemy is enabled:
$ paster create --template=pylons myapp
Enter template_engine (mako/genshi/jinja/etc: Template language) ['mako']:
Enter sqlalchemy (True/False: Include SQLAlchemy 0.4 configuration) [False]: True
To enable ToscaWidgets, edit myapp/config/middleware.py and add the following at the top:
import tw.api as twa
And, after the line that says CUSTOM MIDDLEWARE HERE, add:
app = twa.make_middleware(app, {
    'toscawidgets.framework': 'pylons',
    'toscawidgets.framework.default_view': 'mako',
})
We’ll now create a new controller to serve the test widget:
$ paster controller movie
Inside the controller, we’ll create the widget. Edit myapp/controllers/movie.py and add:
from tw.forms.samples import AddUserForm
test_form = AddUserForm('mytest')
In the same file, update the index method in MovieController to use a template:
def index(self):
    return render('/movie.mako')
We now need to create this template. Create myapp/templates/movie.mako with the following content:
<%! from myapp.controllers.testwidget import test_form %>

<html>
    <head><title>ToscaWidgets Tutorial</title></head>
    <body>
        <h1>Welcome to the ToscaWidgets tutorial!</h1>
        ${test_form()|n}
    </body>
</html>
Finally, configure routing so the controller can be called. Edit myapp/config/routing.py and add (just after the line CUSTOM ROUTES HERE):
map.connect('/movie', controller='movie')
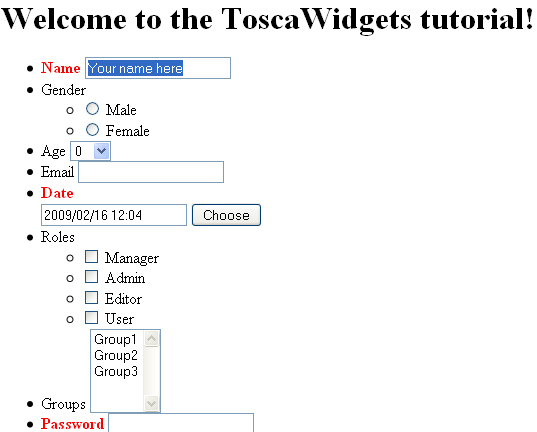
Start the app and load the /movie page; it should look like this:

Warning
The configuration described here does not work well with cacheing done in the Pylons’ render() function.In this scenario it is best to inject resources manually by calling tw.api.inject_resources() on the HTML string before cacheing it.